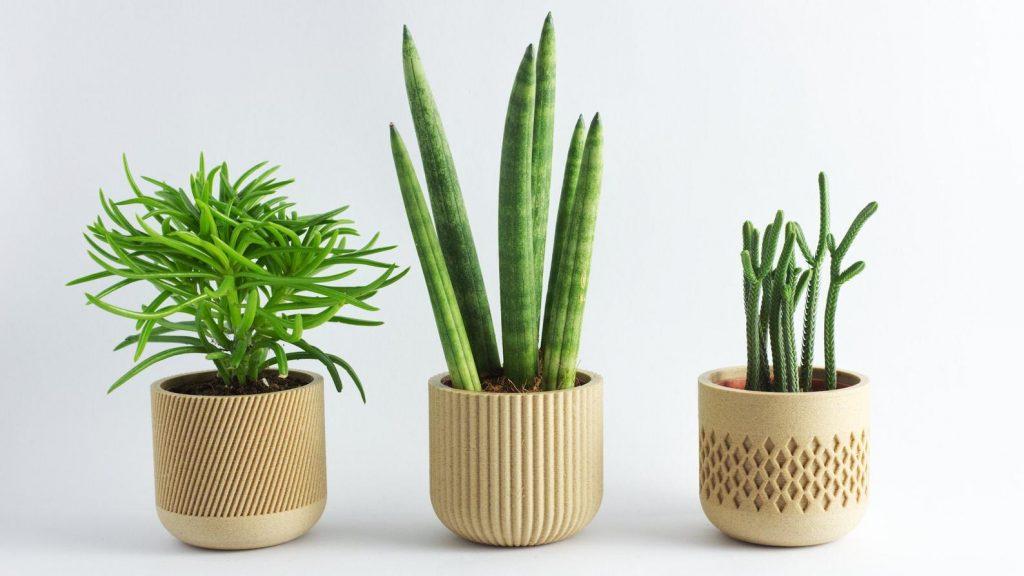
3D printing has revolutionized the way we create and customize everyday items, including flower pots. With endless design possibilities and the ability to tailor each pot to specific needs and preferences, 3D printing allows you to create unique and functional flower pots that enhance your home or garden. Here’s a comprehensive guide on how to make customized flower pots using a 3D printer.
Why Customize Flower Pots with 3D Printing?
Personalization
3D printing enables you to design flower pots that match your aesthetic preferences and fit perfectly into your home or garden. You can choose the size, shape, texture, and color to create a pot that’s truly one-of-a-kind.
Innovation
By designing your own flower pots, you can incorporate innovative features such as self-watering systems, integrated saucers, or unique geometric patterns that aren’t available in traditional pots.
Sustainability
3D printing can be more sustainable than buying mass-produced pots. You can use eco-friendly materials like PLA (Polylactic Acid), which is biodegradable and derived from renewable resources.
Cost-Effectiveness
Creating your own flower pots can be more cost-effective in the long run, especially if you enjoy frequently updating or expanding your collection.
Getting Started: Tools and Materials
1. 3D Printer
Choose a 3D printer that fits your needs and budget. FDM (Fused Deposition Modeling) printers are commonly used for this type of project due to their affordability and ease of use.
2. Filament
Select the appropriate filament for your flower pot. PLA is a popular choice because it’s easy to print with and eco-friendly. For more durable pots, consider PETG (Polyethylene Terephthalate Glycol) or ABS (Acrylonitrile Butadiene Styrene).
3. CAD Software
Use CAD (Computer-Aided Design) software to create your flower pot designs. Tinkercad is great for beginners, while Fusion 360 offers more advanced features.
4. Slicing Software
Slicing software converts your 3D model into instructions that your printer can follow. Cura and PrusaSlicer are popular options with robust features.
Designing Your Customized Flower Pot
1. Determine the Requirements
Identify the key features you want in your flower pot. Consider the size, shape, drainage needs, and any additional features like self-watering mechanisms or integrated saucers.
2. Sketch Your Ideas
Start with rough sketches to visualize your design. Think about how the pot will look and function. This step helps you refine your ideas before moving to the digital design phase.
3. Create a 3D Model
Using your CAD software, create a 3D model of your flower pot. Pay attention to details such as wall thickness, drainage holes, and overall dimensions. If you’re new to CAD, start with simple shapes and gradually incorporate more complex elements.
4. Test and Iterate
Print a prototype of your design and test it for functionality and fit. Check the drainage, stability, and overall look. Make any necessary adjustments to your 3D model to ensure the final product meets your expectations.
Popular Flower Pot Designs
1. Geometric Pots
Create pots with geometric patterns for a modern and stylish look. Experiment with different shapes like hexagons, triangles, or abstract forms.
2. Self-Watering Pots
Design pots with integrated water reservoirs and wicking systems. This ensures your plants receive consistent moisture, reducing the need for frequent watering.
3. Stacked Planters
Print stackable pots that allow you to create vertical gardens. These are perfect for small spaces and can be customized to fit your specific needs.
4. Personalized Pots
Add names, quotes, or patterns to your pots to give them a personalized touch. This makes them great gifts or unique additions to your home decor.
Tips for Successful 3D Printing
1. Optimize Print Settings
Ensure your printer settings are optimized for the filament and design you’re using. Adjust the temperature, print speed, and layer height for the best results.
2. Use Supports and Adhesion Aids
For complex designs, use supports and adhesion aids to ensure successful prints. These can be removed after printing to achieve a clean finish.
3. Post-Processing
Post-process your prints to improve their appearance and durability. This can include sanding, painting, or adding additional components like rubber feet for stability.
4. Keep Learning
Stay updated with the latest advancements in 3D printing technology and techniques. Join online communities, attend workshops, and experiment with new materials and designs.
Conclusion
Creating customized flower pots with a 3D printer is a rewarding and innovative way to enhance your gardening experience. By leveraging the power of 3D printing, you can design and fabricate pots that perfectly meet your needs and preferences. Start with simple projects, iterate on your designs, and gradually tackle more complex creations. Happy printing and happy planting!

